Hello readers, Today in this blog I will explain how to setup a Vulnerable Web Application in your Home Lab using a Raspberry-Pi
If you are also a cybersecurity enthusiast like me and want to have a specific and complex Lab setup just like me then go ahead this article is for you.
Basically, if you also have a Raspberry Pi and want to host a Vulnerable Web Application on it, here are the steps you need to follow
First, let’s see the requirements of our project:-
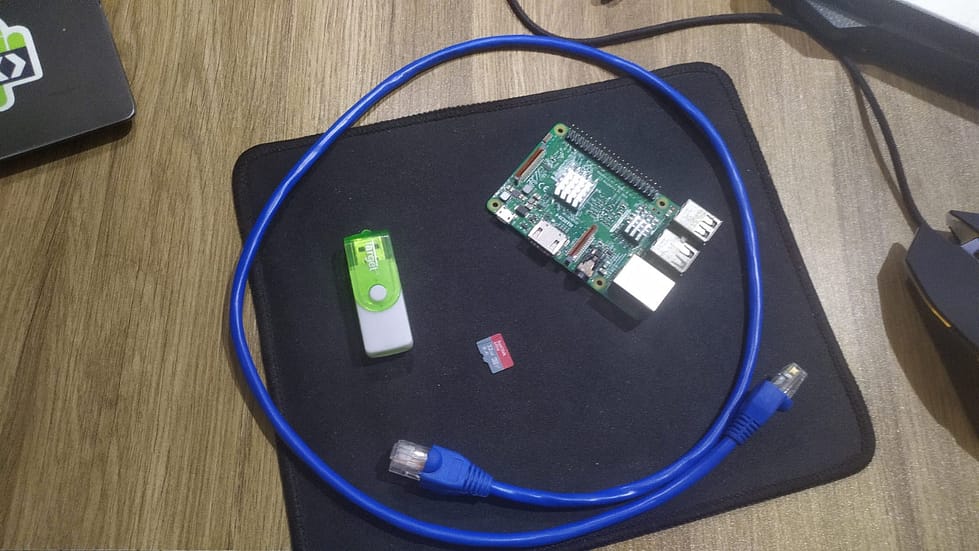
1. Raspberry Pi (I’m using Raspberry Pi 3b+)
2. 16GB memory card
3. A laptop or computer to perform operations
4. Ethernet cable to connect it to Network
5. Memory card Reader

In this project we are going to do the headless installation, so we don’t need a monitor, keyboard, or mouse
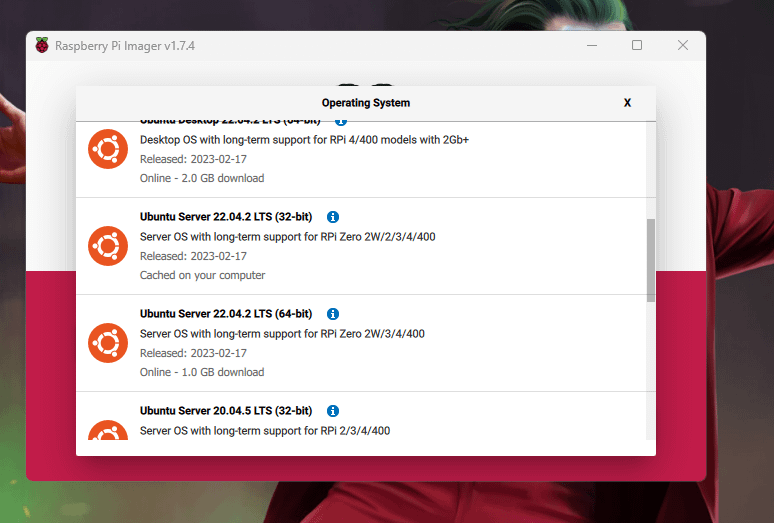
Step 1:- Connect SD card to laptop/computer using an SD card reader and flash Ubuntu Server using Raspberry Pi Imager
here is the link to download the Raspberry Pi imager link
CHOOSE OS > Other general-purpose OS > Ubuntu >Ubuntu Server.04.2 LTS (32-bit) [You can install 64-bit if you are using Raspberry Pi 4]
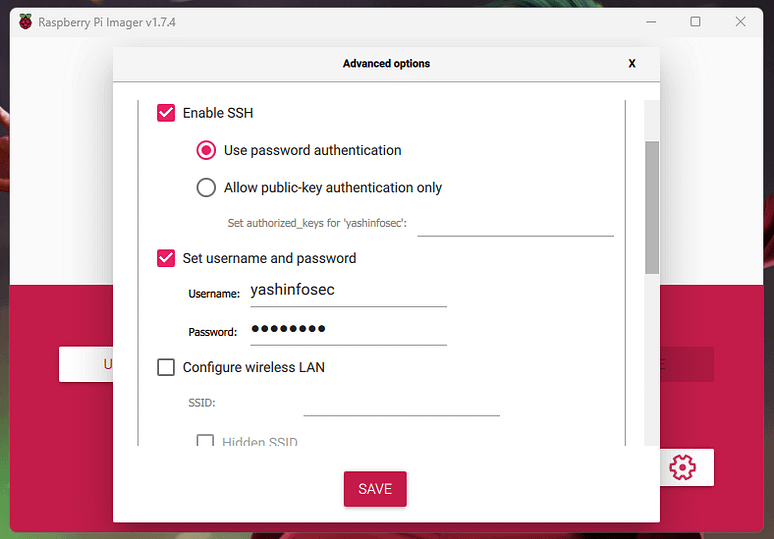
choose SD card as storage and open settings > check enable SSH, and set Username and Password > write
Note:- if the imager pops any warning msg press ‘yes’


Step 2:- Now we need to download a vulnerable website, install a web server, and host the website
first, insert the memory card into Raspberry pi and power the raspberry pi, let the raspberry pi boot completely wait for a few minutes,
when the pi is booted, SSH into pi using the credentials created in the previous step
Installing web server
Now let’s see the software we will be using
1. Apache 2 as the web server
2. MariaDB as Database server
3. php-mysql as the action block
Now we have a bunch of commands to use in order to install and configure the web server
1. apt-get update && apt-get upgrade && apt-get dist-upgrade //Linux command to update
2. apt-get -y install apache2 libapache2-mod-php //command to install the web server and its dependencies
3. apt-get -y install mariadb-server mariadb-client //command to install the database server and its dependencies
4. apt-get -y install php php-mysqli php-gd //command to install the php and its dependencies
5. systemctl enable apache2 //command to run the web server on startup
6. systemctl enable mariadb //command to run the database server on startup
7. systemctl start apache2 //command to start the web server
8. systemctl start mariadb //command to start the database server
9. apt-get -y install unzip //command to install unzip
Downloading and Hosting Vulnerable WebApp:-
Now we will download and configure DVWA on port 80 and juice-shop on port 3000
- cd /var/www/
- wget https://github.com/ethicalhack3r/DVWA/archive/master.zip
- unzip master.zip
- rm -rf html/
- mv DVWA-master/ html/
- cp config/config.inc.php.dist config/config.inc.php
now enter these commands to create and configure the database - mysql -u root
- create database dvwa;
- grant all on dvwa.* to dvwa@localhost identified by ‘p@ssw0rd’;
- flush privileges;
- exit
- nano /etc/php/7.3/apache2/php.ini >>> “allow_url_include = Off >> On”
- systemctl restart apache2
- chmod a+w hackable/uploads
- chmod a+w external/phpids/0.6/lib/IDS/tmp/phpids_log.txt
- chmod a+w config/
Now let’s download and configure juice-shop
1. apt-get -y install docker
2. docker pull santosomar/juice-shop-arm64
3. docker run -d –name juice-shop -p 3000:3000 santosomar/juice-shop-arm64
Now we need to run this docker on the startup, we will configure crontab
1. crontab -e >1
2. @reboot docker run -d –name juice-shop -p 3000:3000 santosomar/juice-shop-arm64

The default username and password for DVWA is admin:password
